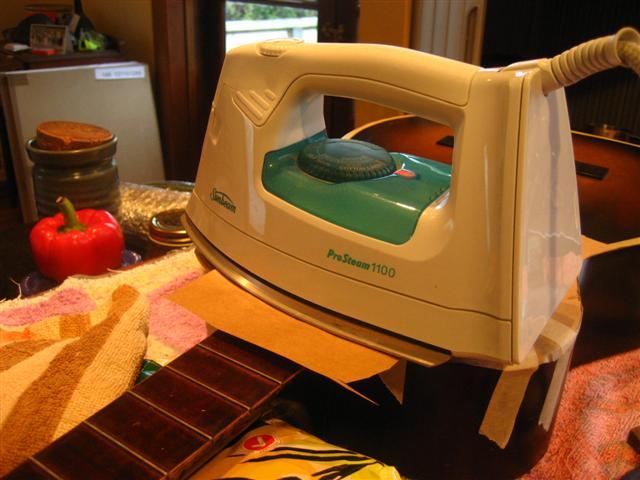
Heating up the fingerboard extension to get the glue melted. Using my trusty iron set to high. Careful not to
get it too hot, but melting the finish (which is some weird, brown, soft, gooey stuff)...is inevitable. No matter.
It will be sanded later anyway.
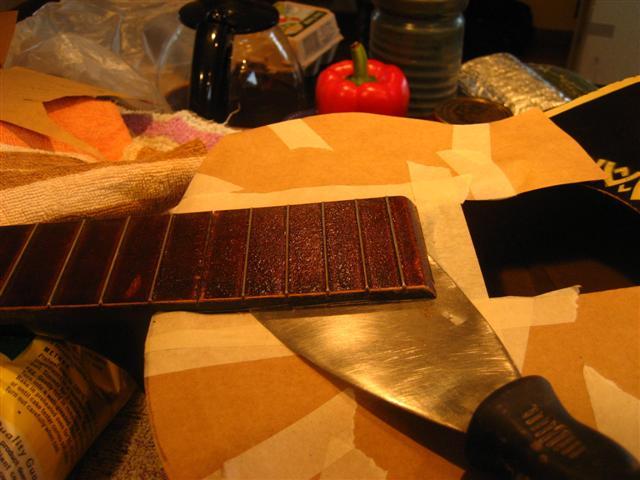
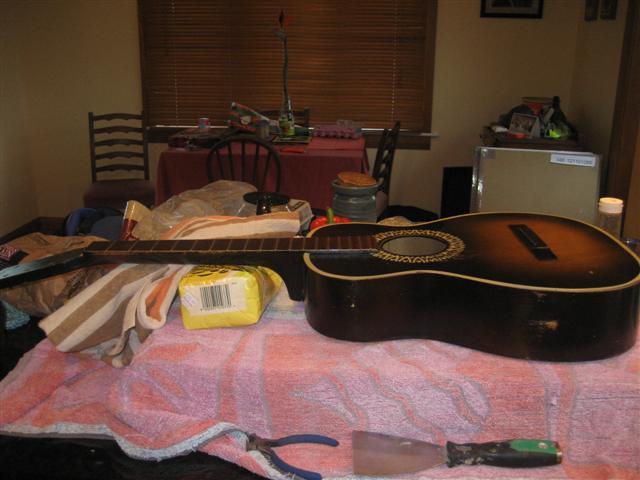
My trusty paint/putty knife from the previous page. Going really well so far.
Drilling the hole didn't go so well. Had a hard time fiding the end of the dove tail. Will update this comment
later when I have had time to check out the hole's possitions. Stay tuned. I'll tell you which hole should have
worked. Honest.
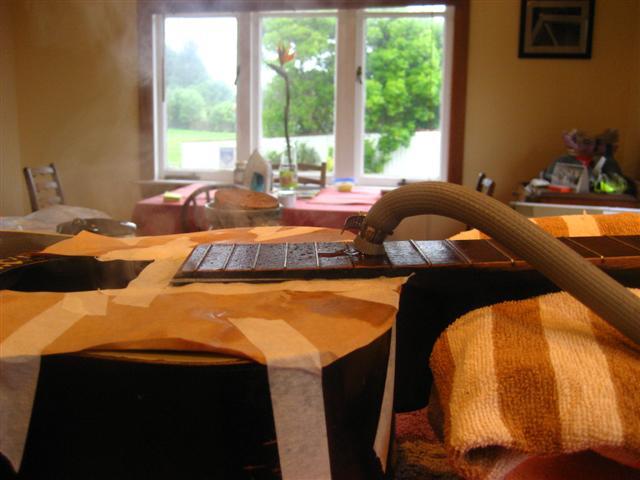
Steaming. For more details on the gizmo, see previous pages.

I'm using a method I saw someone else on the board use, I think Laurie. He used two planks on either side
of the fingerboard and pushed down on the back of the heal. I used a couple phone books and did the same.
Make sure you have this ready in advance, and unlike me, make sure you check every two minutes or so during
steaming to see if you can pop it off. Waiting too long can cause a lot of problems. You want the minimum
amount of steaming you can get away with.
Oh crap. Think I left it too long? Yep. Think I made a mistake putting a towel over it so I couldn't see it? Yep.
Could I do anything else wrong? Yep. Wait and see. But in the meantime, I have to fix this.
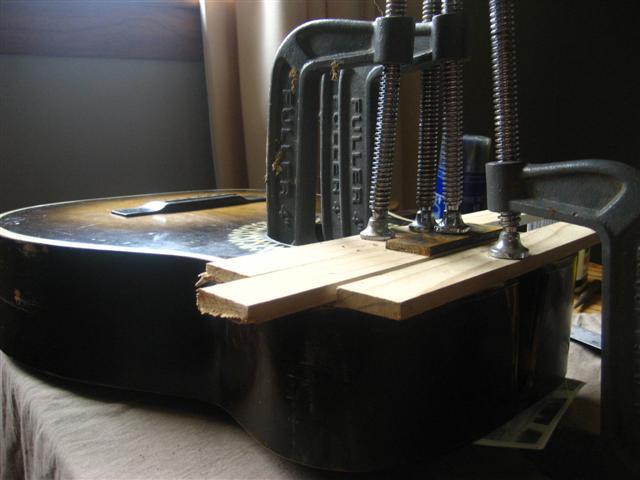
Clamp it flat again, and yes I am in a bit of a hurry before it starts to dry. So even though I don't have as
many clamps asI would like, I get it flattened with some scrap timber then head to the hardware store for more
clamps and more timber from their scrap bin, as I don't have enough small flat bits to finish the amount of
clamping I want to do.
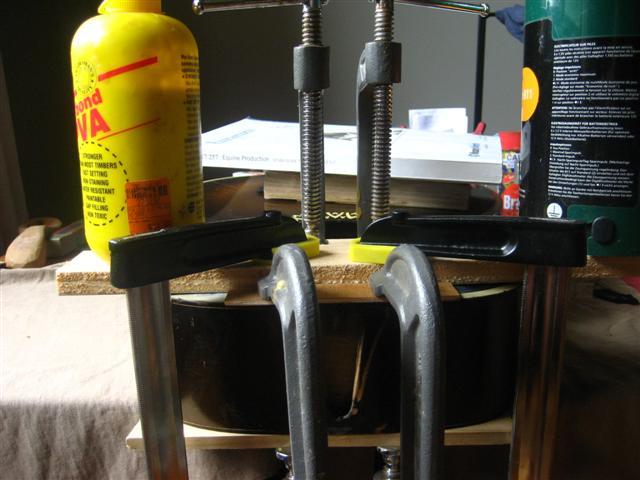
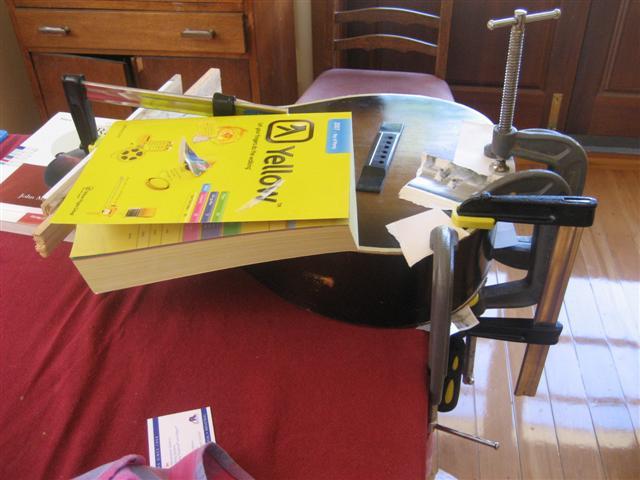
After buying two more clamps and raiding their timber bin, I re-possition and re-clamp. Nothing is being glued,
the glue bottle on the left is lending some weight, so is the electric fence unit on the right. (the green thing)
The books behind the clamps are weighing the other end of the guitar down so that the guitar doesn't flip off the
table from the weight of the clamps.
Two days of clamping later, it's pretty flat again.
The little bulge you see where the seam needs to be glued down ought to be flattened out after I glue and clamp it.
Keep in mind the neck block still isn't reglued onto the top either and I hope any residual waviness will be
flattened out between that, restoring the top brace and gluing on the fingerboard extension. What?
You're right, I forgot to mention I also managed to unglue the top brace next to the soundhole. Well, of
course, you didn't think you could get a wave like that with the top brace still there, do you?
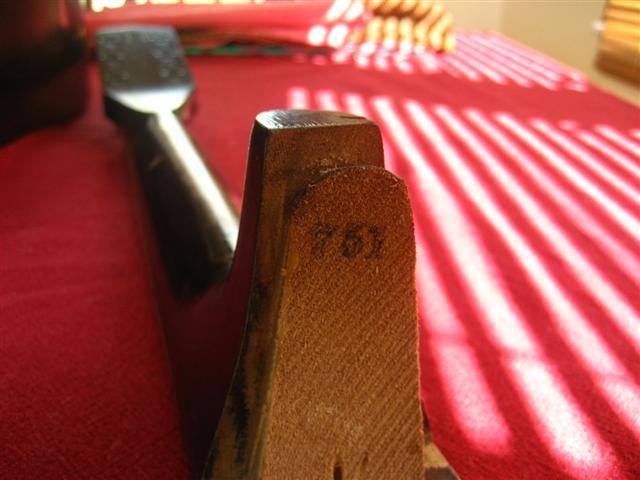
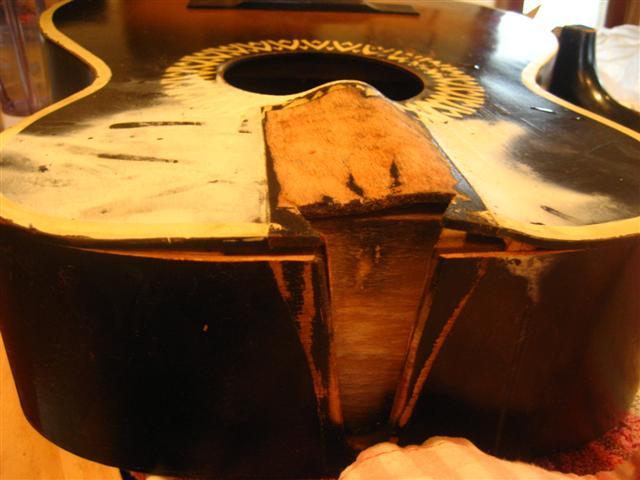
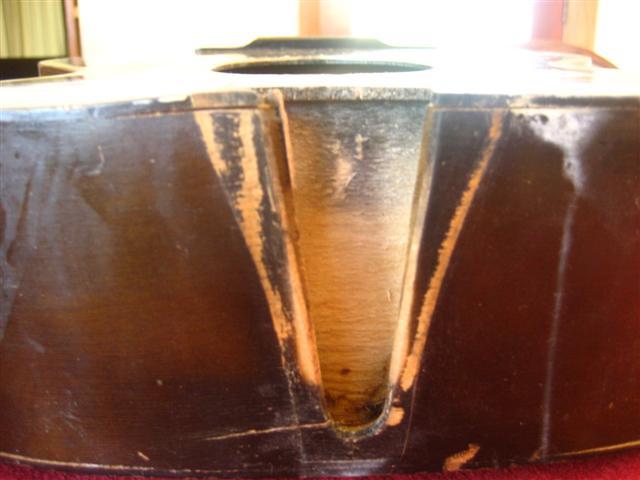
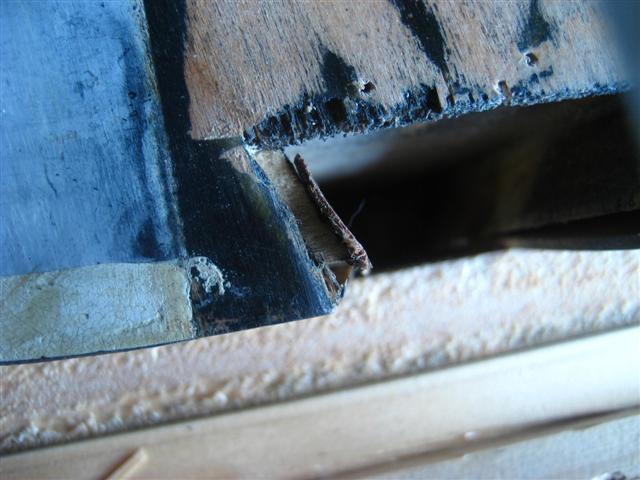
The neck heal. Note the number.
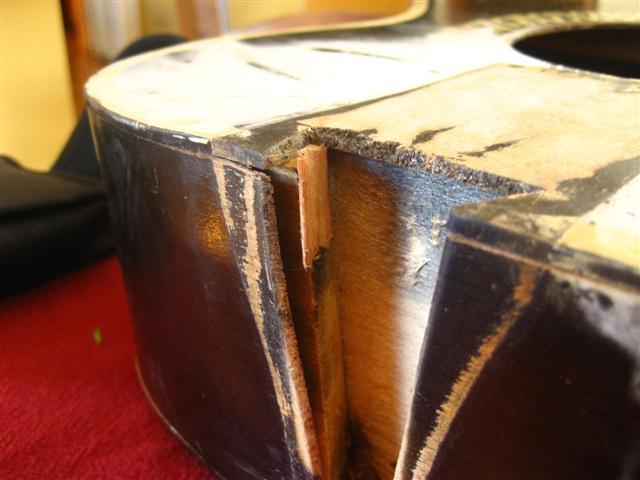
An original shim which I intend to leave there. Now, see that cavity between the side and neck block?
It's on both sides of the dovetail. You can only see one side of it here. That wasn't me, that's original.
The neck of the guitar is actually clamping the whole thing together. This little guitar probably cost
around $4 in 1938, it always was a cheap little fellow. Howerver, it sounds as good as my $600 one and
is worth perserving and playing. This little Harmony, in case you are wondering, cost me $100.
Now, this cavity causes me a problem as you'll see in a minute.
Here is the problem. See that crack? That was caused when the neck came off. The bottom side
of the guitar is held by a little glue, the top of the side has none at all because of the cavity
and is under a lot of pressure trying to peel back to flatten out. The stress of it caused the crack.
One of the next things I need to do is glue a couple shims in the cavities to help hold the sides near the top
to the neck block.
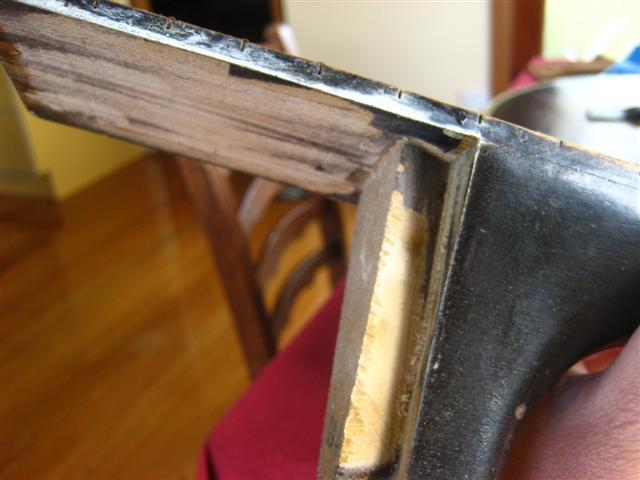
Here's a shot of the male part of the dovetail.

I managed to screw up a couple things while trying to prevent the crack in the previous picture from
getting worse. To hold the side from splitting further, I put a ratcheting ribbon clamp around the body
of the guitar. I have no idea what the real name of the thing is. It's like a long ribbon of webbing with
a ratchet on it that clamps stuff like onto trailers or whatever. Anyway, by doing this I managed to deform
the tail end of the guitar and pop the seam on the bottom piece. The next two pictures show what I mean.
I'm not as worried about this as you might think, since I saw online a guy who deliberatly deforms the top of
guitars similar to this to reset their neck angle. He then just trims the excess off the top. I haven't
investigated why or how this works, my point is I decided I'd rather just glue and clamp the bottom back
on in the possition it is in and trim the rest off later, rather than try to re-arrange the shape of the
guitar without having a proper form/jig to do it with, as a real luthier would. That's just far too
complicated for my kitchen table! Those cracks in the butt were there since I bought it but I thought
I may as well put some glue in them when I clamp the butt anyway and kill two birds with one rock.
I wanted to give that crack some support while I figure out the shims for the cavity I mentioned before which will
support the sides even more fully so I put some glue in the crack and on the lower part of the neck block to
glue the bottom of the sides down more securely. I can't put the shims in the cavity until I can stabilize it
enough to be able to check that the male part of the dovetail will fit fine with them in. This photo shows
the clamp holding it tight as it dries. Inside the guitar, against the neck block is the same helpful scrap of
wood previously used to knock the nut off. Helpful little fellow he is.
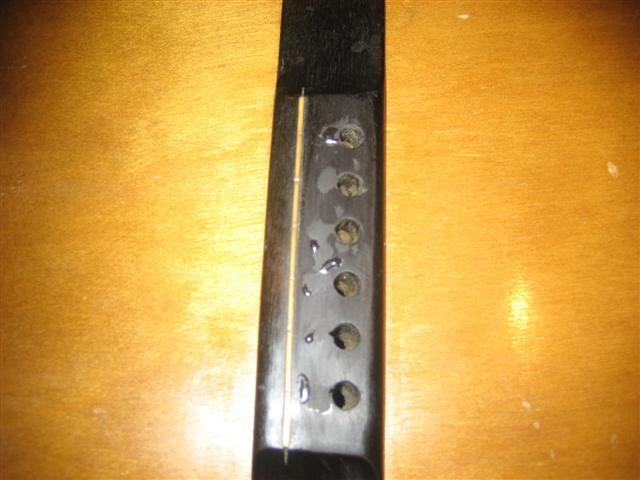
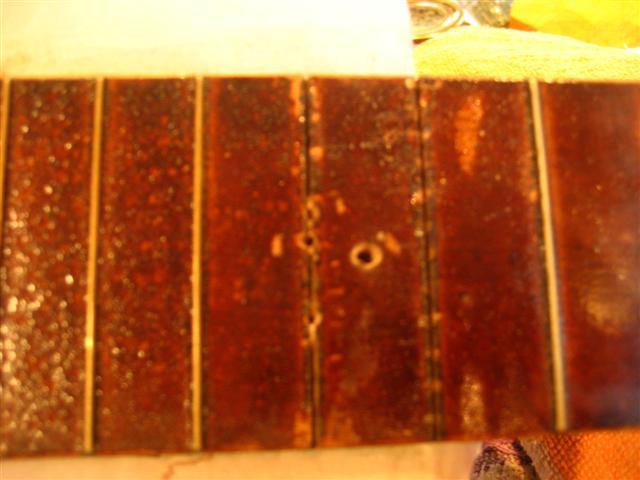
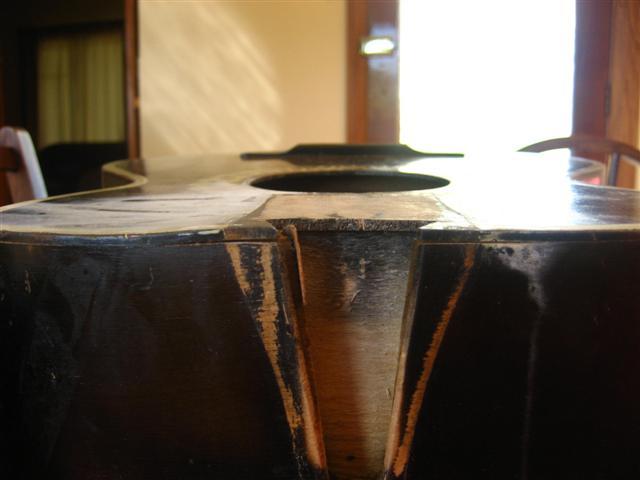
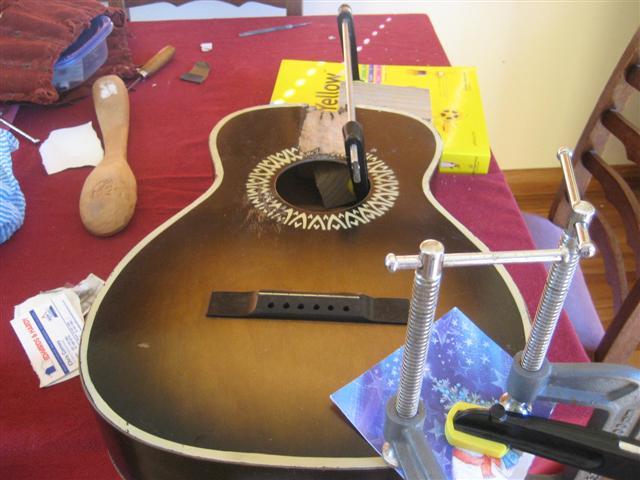
Here's a shot of that original shim from above the dovetail. You can also see two of my drill holes at the
thirteenth fret. As I mentioned before, I ended up drilling half way between the twelfth and thirteenth and gaining
access to the pocket there. A couple mm further towards the head from the twelfth would have hit it right on,
or, angling the drill more towards the head from the twelfth would have worked too. In actual fact, the possition
of those holes would also have worked if the top didn't overhang the join a bit, causing me to think I had missed.
A longer drill bit would have shown me I had indeed hit the right spot; I just wasn't expecting the width of the
top as well as the fingerboard. It's weird that the top board overhangs the dovetail.
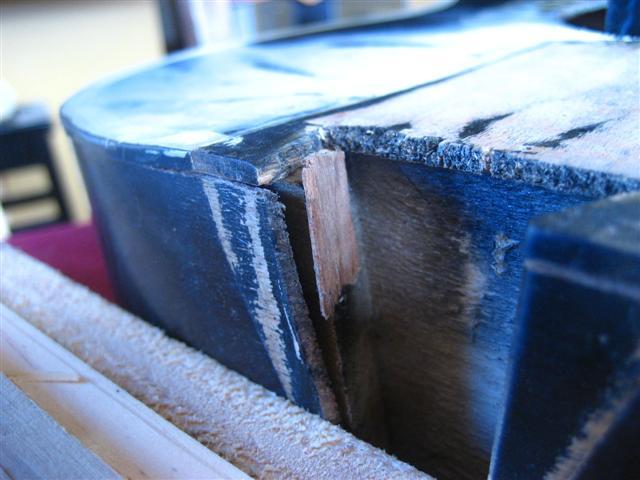
Another shot of shim and dovetail and overhanging top.
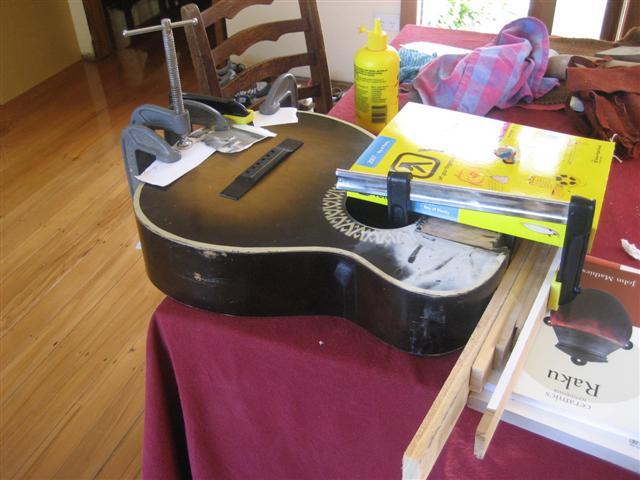
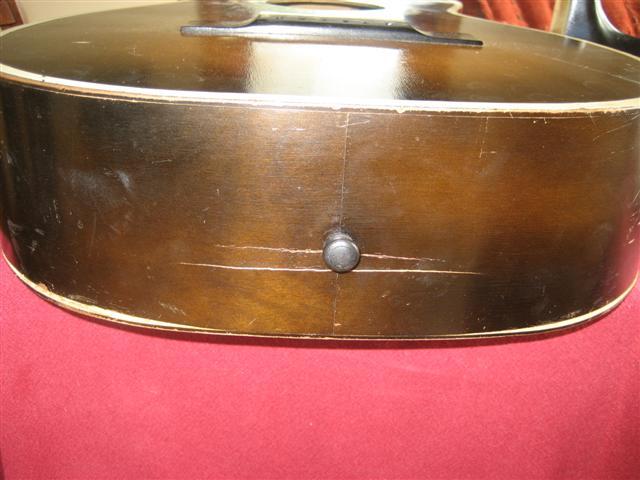
Some shots of the rear left clamped. I don't have enough clamps to do the right and left at the same time.
As seen from the back. At this point I have also put glue in the cracks near the strap button which
were there when I bought the guitar. I suspect the tail block may not have been glued flush either,
otherwise I don't see how those cracks could have formed. I would have liked to put a patch on those
from the inside but my arm can't get that far down toward the end block.
The yellow pages hold the guitar down so it doesn't flip off the table from the weight of the clamps.
The guitar is now being left for twenty four hours to dry and harden up. I'm using carpenters white glue, Fuller's max bond pva. Non staining, water resistant, fast setting, gap filling, non toxic. Why? Because I've used it or it's
variation, carpenters yellow glue, for the last few years on the woodwork in my house and I'm familiar with it
and it's properties. I've had enough suprises with this project so far to mess around with mixing hide glue
and tite bond isn't available here.
My to-do list on this project is as follows:
1. Glue the bottom back right seam
2. Glue the top to the neck block
3. Make sure the dovetail fits in WITH the new shims I want to put on in place to support the sides at the dovetail.
4. Glue the new shims in place to help support the sides.
4.5 Glue the top brace back in, and clamp.
5. Reset the neck
6. Shim the dovetail as required in neck reset
7. Glue and clamp the neck
8. Sand the fingerboard
9. Replace the frets
10. Replace the bridge saddle
11. Finish the nut, glue into place.
12. Fix any overhangs from the bottom re-glue by sanding.
13. Some day maybe re-think the bridge, but no rush.
Clamping the back on the other side.

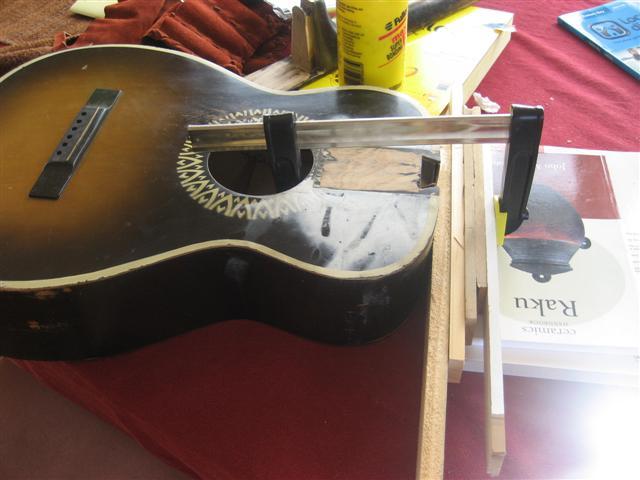
With the crack stabilized I tried out getting the neck back on. The whole guitar seems slightly out of kilter
and I've decided to re-glue the sides to the neck block after some experimentation rather than force the neck on.
This may mean I will have to re-heat the bass side top to get it loose enough to shift it inwards. There's
nothnig else I can do for now as the trebble side neck block dries overnight. I've also taken the methelated
spirits to the top to get rid of the white blush. This worked well instantly. It seems to melt the laquere.
I had a bottle of it because I use it to wash my floors with, mixed with water. Diluting it with water was not
effective when used to get rid of blush, though. Use it straight. I applied it with a bit of cotten t-shirt. It
may be better to brush it on so as to avoid texturing the top. Applying new nitrocellulose laqueur
(info from frets.com) melts old laqure as well so I wonder if that would have worked too.
Jaydee
This page was saved from this original url
My harmony guitar lutherie page 2.
My harmony guitar lutherie page 1.
My harmony guitar.
back to Kamikazie Lutherie Index