Beware ! You're in Kamikazie here. Not many pro luthiers around, more often brave souls experimenting in their kitchen.1969 Harmony Stella H942 restore project - by Daniel
Dan : I would like to ask in advanced for the lack of pictures in this write-up. I am not very good at stopping with what I am working on to snap a few pictures. I did take pictures at the end of each day that I worked on the guitar, so hopefully you'll get an idea of what I had done.
Anyhow, this guitar, my 1969 Harmony Stella H942, is one I was looking for, for almost four years. I had purchased one for my sister at a garage sale four years ago, in almost un-played condition, for $20, and after I did a set-up to it, I was jealous, and wanted one for myself. Finally, via a CraigsList ad, I got my own for $30, though it was in rough shape. Since I had worked on other guitars, I was up to the challenge. Keep in mind, I am not a professional luthier, I just do this for fun.
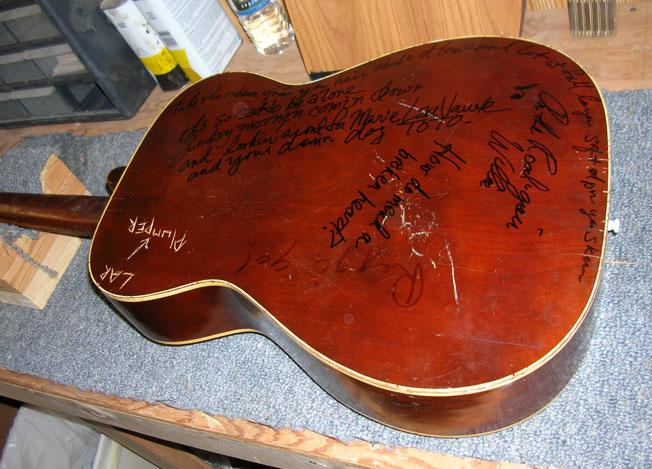
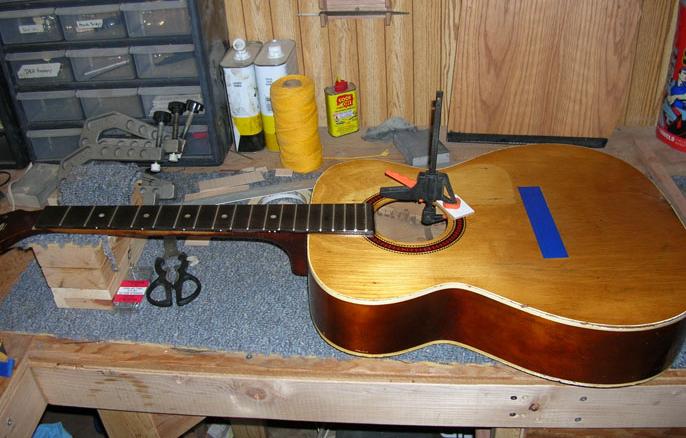
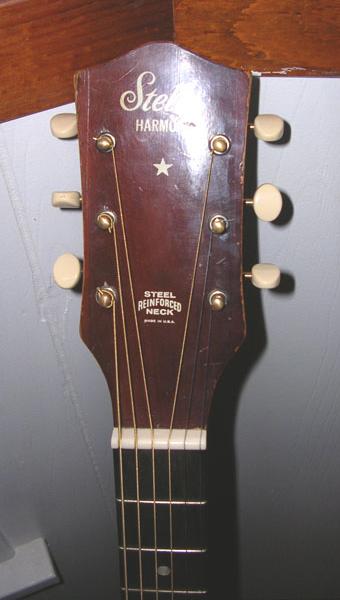
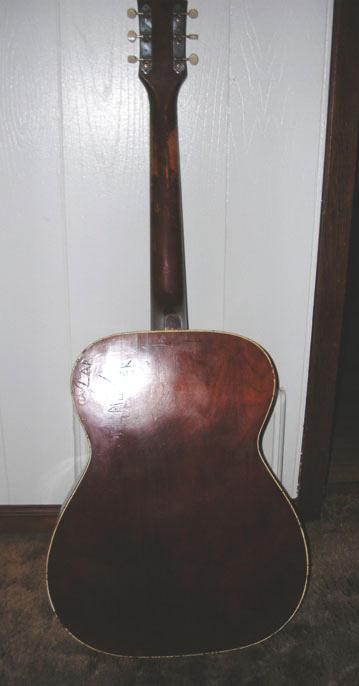
Anyhow, here is the guitar as I received it.
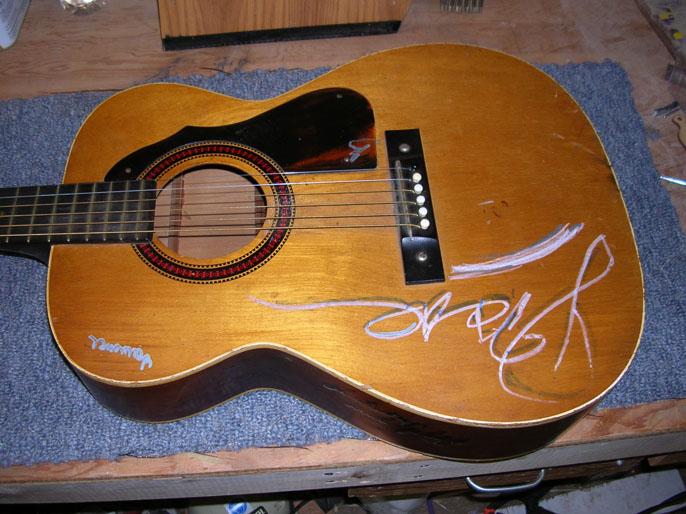

As you can see, I had my work cut out for me. The list of what I had to do was clear to me:
- Remove "Graffiti"
- Remove nut
- Remove bridge
- Repair belly bulge
- Repair two sound hole cracks
- Re-fret
- Fill in screw holes in the bridge
- Replace saddle with bone
- Carve new bone nut
- Locate and install new tuning machines and bushings
- Add finish to protect what was left of the original (but not restain)
- Inlay position markers
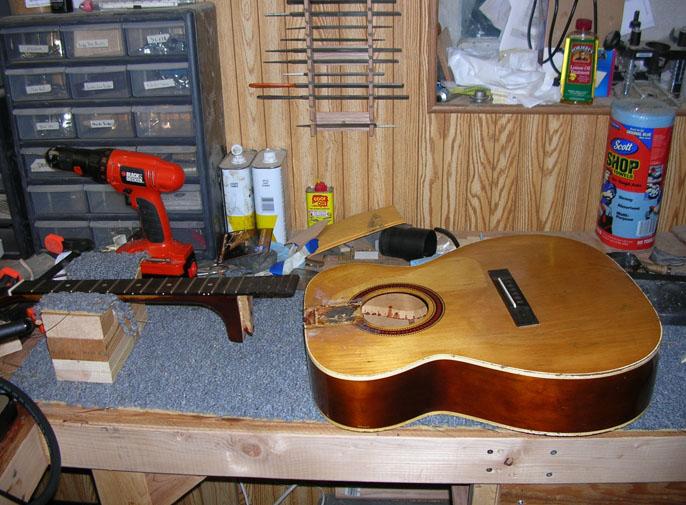
First, to remove the graffiti, I used Goof Off (not to be confused with Goo Gone). I used Goof Off because it is good at removing paint and permanent marker, without ruining the finish. All of the paint marker and permanent marker came off just fine, and also some grime. There is a slight remnant of marker on the top, but not bad considering what I started with. Next, I removed the nut, tuning machines, pick guard, end pin and bridge.

Next, to remove the belly bulge, which I didn't take a picture of, I used a clothes iron, and a wet rag over where the bulge was, and applied the hot iron to it, replenishing the water as needed. After 10 minutes of this, I clamped a piece of maple on the front and back of the guitar, and left it for the week. The outcome was a perfectly flat guitar. The heat also heated up the original hide glue from the brace, and as a result, it got reglued to the tip. Also, using hot hide glue, I glued in a 1/16" piece of maple for a bridge plate overlay, to help strengthen the area a bit more.
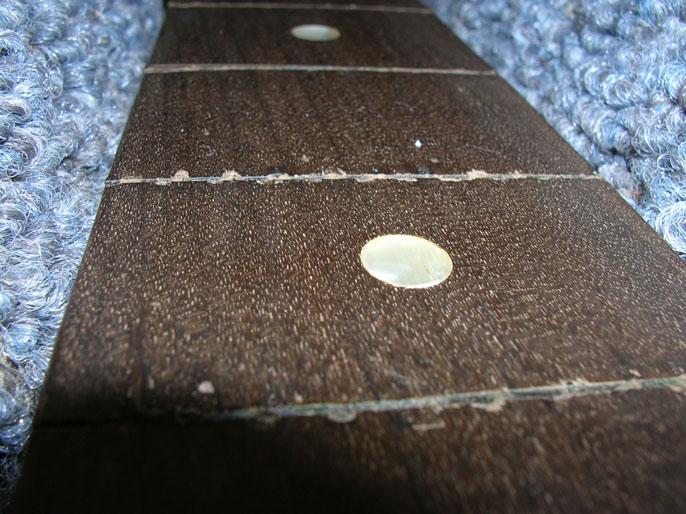
Next, I removed the frets. I also inlaid the position markers. I have a hard time playing a guitar without them, so this is the only modification I was willing to do to this guitar.
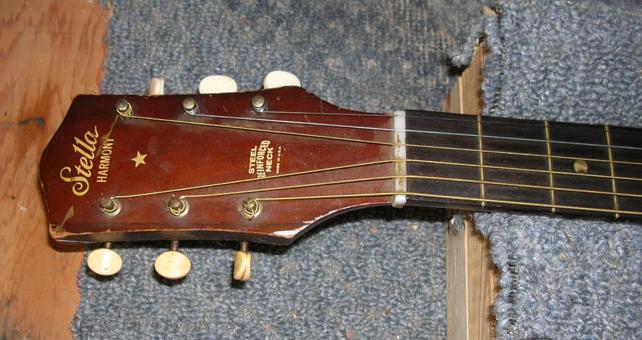
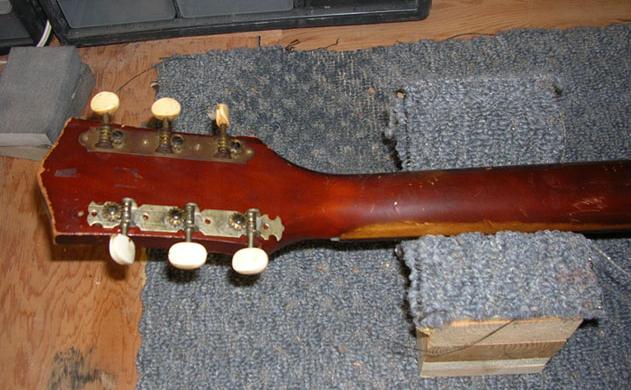
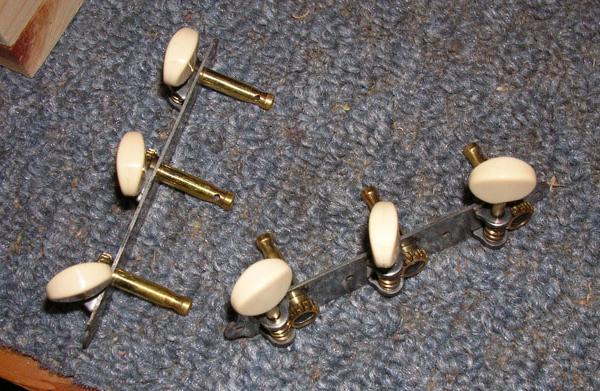
As for the tuning machines, I located a set and a half at a used music shop. They weren't complete, but with that set and a half, plus my half set, I was able to build a complete set. I than buffed them out, posts, plates, buttons and all, and felt they looked pretty good. I also acquired a full set of the bushings, and buffed those out as well.
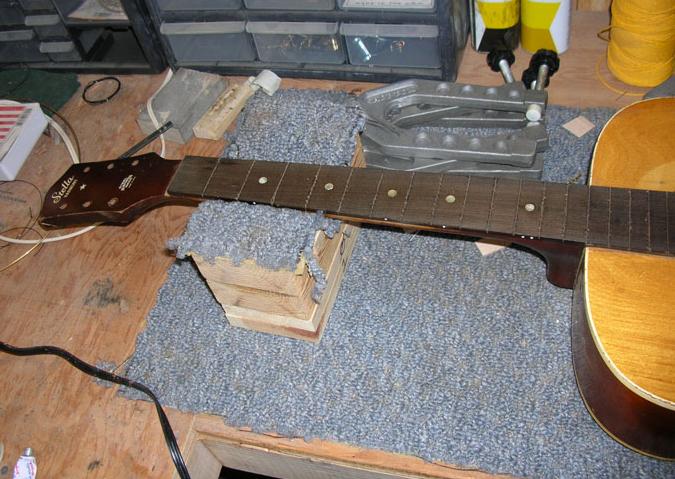
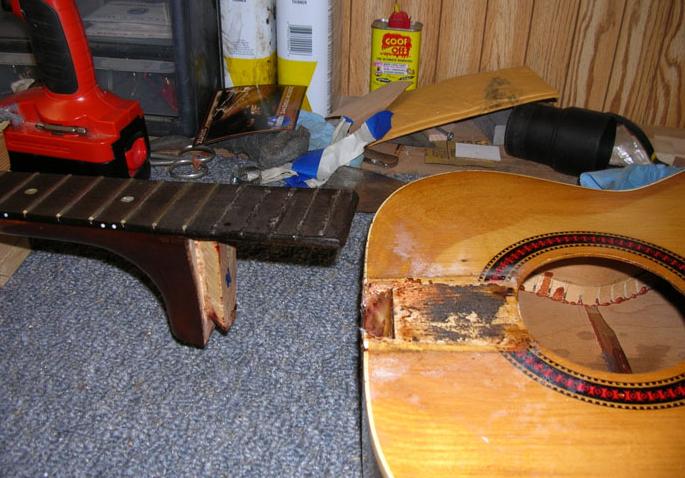
After pulling out the old frets, the fret board cleaned up quite well. To pull out the frets, I took a soldering iron, carved a notch in the tip so as not to have it slip off of the frets. Heated each fret while using my flush cutting snips to carefully pry them out. The wood is Madagascar ebony, judging by the smell and the looks of the wood. Because it is a 40-year-old piece of ebony, it was a bit brittle. I had a lot of chips come off with the frets. I used CA glue to quickly glue in the chips, sprayed hardener onto a knife, and ironed the chips in place. I sanded down the fret board, and kept finding more chips that I needed to glue. After three tries, I had all of the chips glued in, and than sanded the board down, starting with 150-grit, moving all the way up to 600-grit, for a nice smooth board. Also, it polished up the dot markers nicely, and they were flush with the board.
Installing the new frets went off without a hitch. I just followed Frank Ford's advice (www.frets.com) on fretting. Now, I have nicely polished and crowned frets.
Next, I had to repair two cracks near the sound hole. For the one next to the fret board, I clamped the butt of the guitar down, and than clamped the neck down just until the crack perfectly lined up. Than, I took a 1/16" thick piece of maple, and using hot hide glue, glued in the cleat under the crack, and clamped it overnight. The next day, I took an exacto knife to carve the excess wood away, and bevel the edge so it isn't noticeable, but strong. The other crack, I repaired the same way, minus clamping the neck and body down as that crack was perfectly lined up just fine.
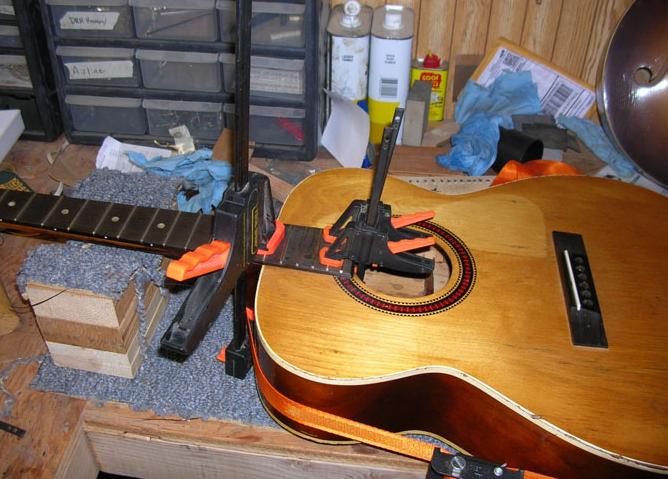
I then applied three coats of clear shellac, which is the original finish, sanded and buffed it out. I than re-glued the bridge with hot hide glue, added the new bone saddle, and the new bone nut. Actually, before I reglued the bridge, I filled in the screw holes with ebony dust and CA glue, sanded it down, buffed it out. I hate the way the screws looked, and also hate the way they dampen the sound. I guess that was modification #2, but this one needed to be done. Well, after I did all of the above work, I measured for action. It was too high. I figured that after fixing the bulge, and aligning the crack by the neck, the action would be fixed. It was lower, but not low enough. Well, time to bring out the steam needle. I removed the 15th fret and following, drilled my little hole in the 15th fret, and turned on the steam. Having originally been constructed with hide glue, the neck came out of the joint in 4 to 5 minutes.
I cleaned up the area, and got the correct angle in the neck. Again, I didn't take a picture of the process, but I followed Frank Ford's instructions for this as well. I installed the frets I took out before installing the neck back onto the guitar. I glued the shims and the neck with some Hot Hide glue, and clamped it all up overnight.
The next day, I re-leveled the last frets, re-crowned them and re-polished them. Nothing like doing the same job twice.
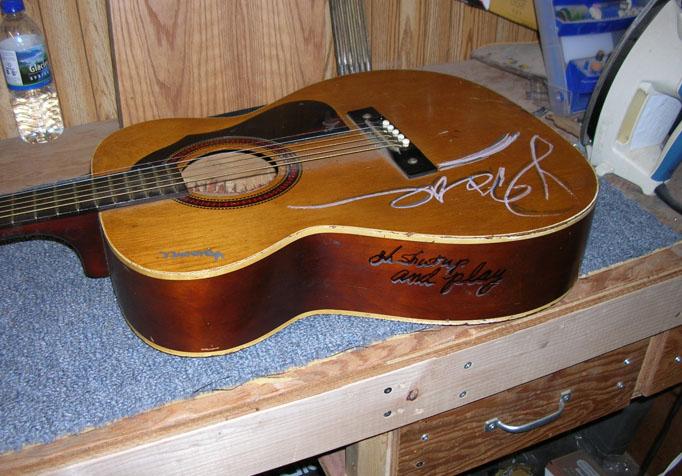
The outcome is a nice playing, and much better looking guitar than what I started out with.
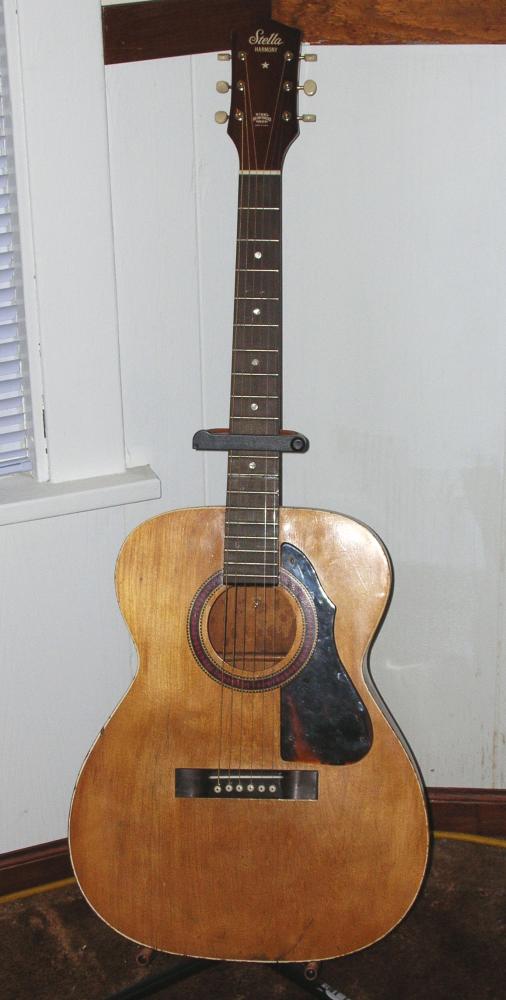
I didn't apply any additional stain. This guitar was well played, and deserved it's well worn in look. Plus, she has plenty of mojo.
The bone saddle, and not having those two giant screws in the bridge really do open up the sound of this guitar. I am glad to finally have an H942 to call my own.
Hope this was enjoyable, and somewhat informative.
Dan
Jaydee : That's an awesome addition to our board, Dan! I've been wondering if heating and clamping the belly would get rid of that belly bulge our guitars get as they age. I thought it might since it worked so well at getting rid of that massive warped wave I caused by over steaming. I've been thinking about some kind of bridge plate for mine, it's got just a little bulge, not enough to worry about yet but I don't want it to get any worse.
Can you explain the bridge re-enforcement overlay a bit more? Is it the same size and shape as the old one or did you make it larger? As I said, I was thinking of doing something similar.
PS you made it look easy. How long did all that work take you?
Dan : I made the bridge plate overlay the same size as the original. I beveled the edges on it. According to Frank Ford, it makes it harder to be pried off. On mine, and a lot others, with the ladder bracing, it was easy since it's just a rectangular piece of wood. I made it about 1/16" thin, and made it out of maple since it's strong wood. Added some hot hide glue, clamp it overnight drill out the holes (with another piece of wood under it so I would get too much chip-out) and I now have a reinforced plate. This one didn't need it too badly yet, but it was getting warn out something fierce, so I went and did it anyhow sinced I was already doing all the other work on it.
As for how long it took me, I'd say about 8 or 9 Sundays (which is the only day I get shop time these days) at least. I couldn't even tell you how many hours. Trust me, I wouldn't say it was easy. It was a lot of work, and some redoing. I have worked on other guitars before this one, so I had some practice done, though, this was my first neck reset and refret.
january 2008
back to Kamikazie Lutherie Index |


